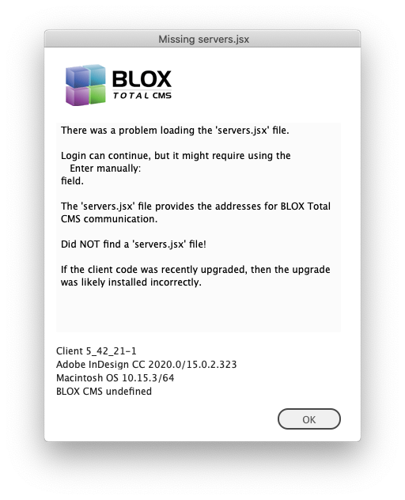
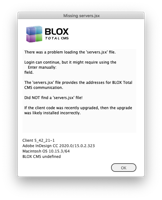
This image shows how a distributed production remote user might first view the login dialog prior to the auto creation of the servers.jsx file.
This is one of two dialogs that users with access to multiple domains will see during the Log In process.
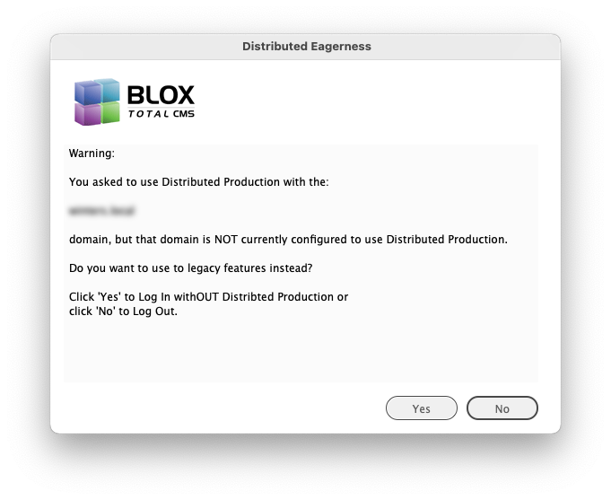
If you receive this dialog, the domain you tried to use isn't completely configured for distributed production. Remote users should click the No button because they can't work without Distributed Production being enabled.
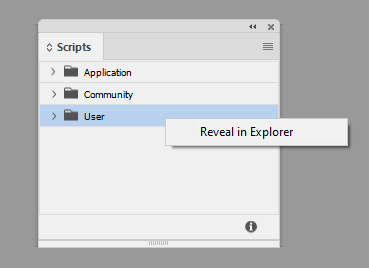
In all versions of Adobe InDesign there will be a Scripts panel. You can find this in current versions by choosing Window > Utilities > Scripts. Once that opens, there should be a folder titled User. If you right-click on the User folder, you should be presented with an option to Reveal in Explorer or Reveal in Finder depending upon your host operating system (Windows or macOS respectively).
Remote Client Installation for Distributed Production
By Jon S. Winters
Product Architect
For Remote Installation Only
This article covers the installation of the BLOX Total CMS client on remote computers for Distributed Production use. For standard or local installation instruction see: Computer Setup
The Actual Installation
1. Make the tcms folder on the remote computers
This will be in the USER's folder. This is important because it allows the user to have the permissions they need, and it prevents any issues with shared workstations providing access to pages and items left in use (locked) by other users.
On MacOS make a folder at ~/tcms/
On Windows make a folder at %userprofile%\tcms\
The case of TCMS should not make a difference. However, below this folder, the formatting of the remote computer's storage could cause it to matter if the case is different, so use the cases of the folders as presented.
2. Make a tcms_data folder in the tcms folder
On MacOS you should now have ~/tcms/tcms_data/
On Windows you should now have %userprofile%\tcms_data\
3. Make an ActiveVersion folder in the tcms_data folder
Into the /tcms_data folder created in Step 1 add the ActiveVersion folder. You should now have:
On MacOS you should now have: ~/tcms/tcms_data/ActiveVersion/
On Windows you should now have: %userprofile%\tcms_data\ActiveVersion\
4. Load the two client folders into ActiveVersion
Copy the client's two folders (resources and Startup Scripts) into the ActiveVersion folder from Step 3 above.
The two folders are in the release's .zip file. You can copy this from your file server's existing installation, or you can request the current client using a support ticket at support.townnews.com. At some point in will also be available for download from Page Tracker.
5. Copy your Add-ons folder from the file server to the local tcms_data folder
Client 5.57 & Page Tracker version 1.18 and all newer versions:
Use the Development Mode feature to 'Upload Add-Ons...'. This will then automatically install the selected add-ons on the remote computers.
Older Versions/Combinations:
Unique to each site is a folder of customized scripts and settings files that automate folios and may provide output naming options, previews and custom exports for third-party archives. The proper path for this folder that you will copy with its contents is:
MacOS: ~/tcms/tcms_data/Add-ons/
Windows: %userprofile%\tcms_data\Add-ons\
If you notice that folios are not working, output generates errors, or archives are not being populated, a misconfigured set of add-ons might be the culprit.
6. Create the Alias or Shortcut for Adobe InDesign
Adobe InDesign needs to know where the ActiveVersion folder is. Make a MacOS Alias or a Windows Shortcut of that folder. Place that Alias or Shortcut in either of the Scripts folders for Adobe InDesign. That is outlined in Computer Setup. But where it talks about the ActiveVersion on the server, you are going to use the ActiveVersion folder created above on each local workstation.
SUPER IMPORTANT: For distributed production users that share computers, place the alias in the USER's Scripts folder and not the application's version. This is different from the In-Office installation method of placing it in the application's Scripts folder. If a workstation is shared, having it in the application's Scripts folder can cause a variety of undesirable issues with Distributed Production.
Note: This is for users that are both distributed AND share computers. This is an odd combination. But, if that is what your users are doing, please follow the installation below.
MacOS Users:
On a MacOS workstation that path is reachable via the Finder's Go > Go to Folder... and the generic path for Adobe InDesign Creative Cloud version 2023 (18.x) would be:
When prompted with that dialog, click the OK button.
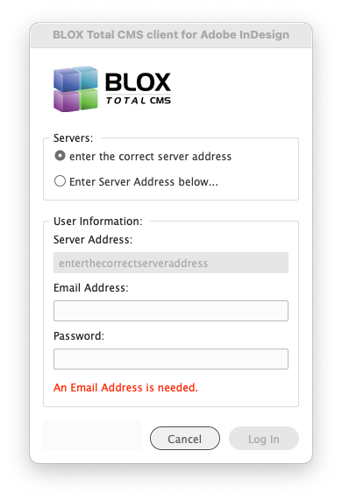
You should then be prompted with some form of the standard Log In dialog, similar to the one below:
This image shows how a distributed production remote user might first view the login dialog prior to the auto creation of the servers.jsx file.
The remote user should follow these steps:
Click the Enter Server Address below... radio button
Enter the server address for your site. The server address is unique to every site and you should know this address. This is the same server address that the users use to log in to BLOX Total CMS, either locally or remotely. Provide your remote users with the address because there is an excellent chance they have no idea what it is.
Enter their BLOX Total CMS account e-mail address. DO NOT allow multiple users to share accounts. In addition, generic/shared accounts like “paginator1@domain.com” can cause havoc with page locking in a Distributed Production environment. Accounts should be unique to the actual user.
Click the OK button.
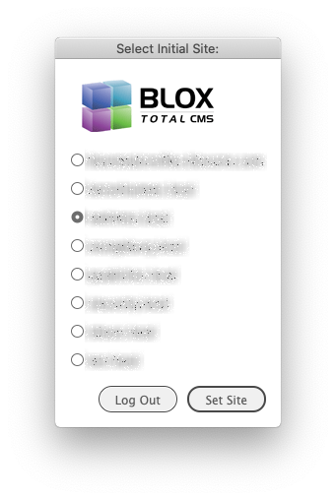
If your user has access to multiple domains on the supplied server, they could get prompted to select a default domain with a dialog similar to this one:
This is one of two dialogs that users with access to multiple domains will see during the Log In process.
If so, have them select the desired domain's radio button, and then click the OK button.
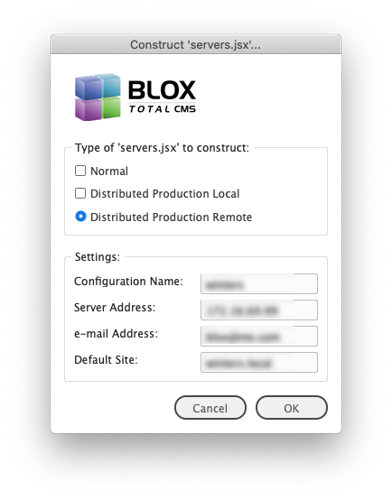
After that, if it appeared, you should see a dialog to Construct ‘servers.jsx.’ That dialog looks like this:
The Type of 'servers.jsx' to construct: should be Distributed Production Remote
The Configuration Name: will only be seen by the remote user, so it's not important, but if you want it to be consistent (for your own internal support) provide the remote users with instructions on what to type there. It will pre-fill with the selected domain name, or a combination of available domains, and that default is fine. It is just a name.
The Server Address: should pre-fill from the value used to log in. They should leave it alone because things only work when the address is correct.
The e-mail Address: is their account ID they just used. Leaving it there allows logging in to be ever-so-slightly easier after an Adobe InDesign update, providing this servers.jsx is for a single Remote user.
Finally, you might have a Default Site: shown. This will be the one selected in the prior dialog if the user can log in to more than one domain on the server.
After filling in all values, click the OK button.
If the domain was configured for Distributed Production, everything should be fine. If not, the user will get a dialog that they are not ready. It will look like this:
If you receive this dialog, the domain you tried to use isn't completely configured for distributed production. Remote users should click the No button because they can't work without Distributed Production being enabled.
Click the No button if that dialog is displayed. Else, proceed to loading the additional/optional items.
Additional/Optional Item Installation
Follow this link for additional or optional items to be installed.